If your car is leaking coolant and you’re trying to figure out why, don’t overlook the radiator cap. It might seem like a small part, but learning how to fix a radiator cap could save your engine from serious damage. A leaking radiator cap can cause all sorts of problems—pressure buildup, coolant loss, and even engine overheating. But the good news? There’s a simple trick you can try before running to the auto shop.
Sometimes you’re just stuck—maybe you’re hours from home, and the coolant cap isn’t sealing right. Maybe the local store doesn’t have the right replacement. It happened to me, and I’ll show you a quick DIY fix that can keep you moving without risking your engine.
Let’s dive in.
Table of Contents:
- What Does the Radiator Cap Actually Do?
- Signs You’re Dealing with a Leaking Radiator Cap
- The Quick DIY Fix to Stop the Leak
- When to Replace the Radiator Cap
- Extra Tips for Keeping Your Cooling System in Top Shape
- Why Pressure Matters in Your Cooling System
- Common Mistakes When Replacing a Coolant Cap
- Final Thoughts
What Does the Radiator Cap Actually Do?
The radiator cap isn’t just a lid. It plays a crucial role in maintaining the pressure in your cooling system. It’s designed to hold a certain pressure level, which raises the boiling point of the coolant and helps the engine stay cool.
When the cap gets old, the cap seal can wear out, the rubber dries up, and it stops sealing properly. That’s when you lose pressure, coolant leaks out, and the engine starts overheating—all because of a tiny part you might never think twice about.
Signs You’re Dealing with a Leaking Radiator Cap
Before you grab your tools, you need to know what to look for. Here are some common signs:
1. Coolant Leaks Around the Cap
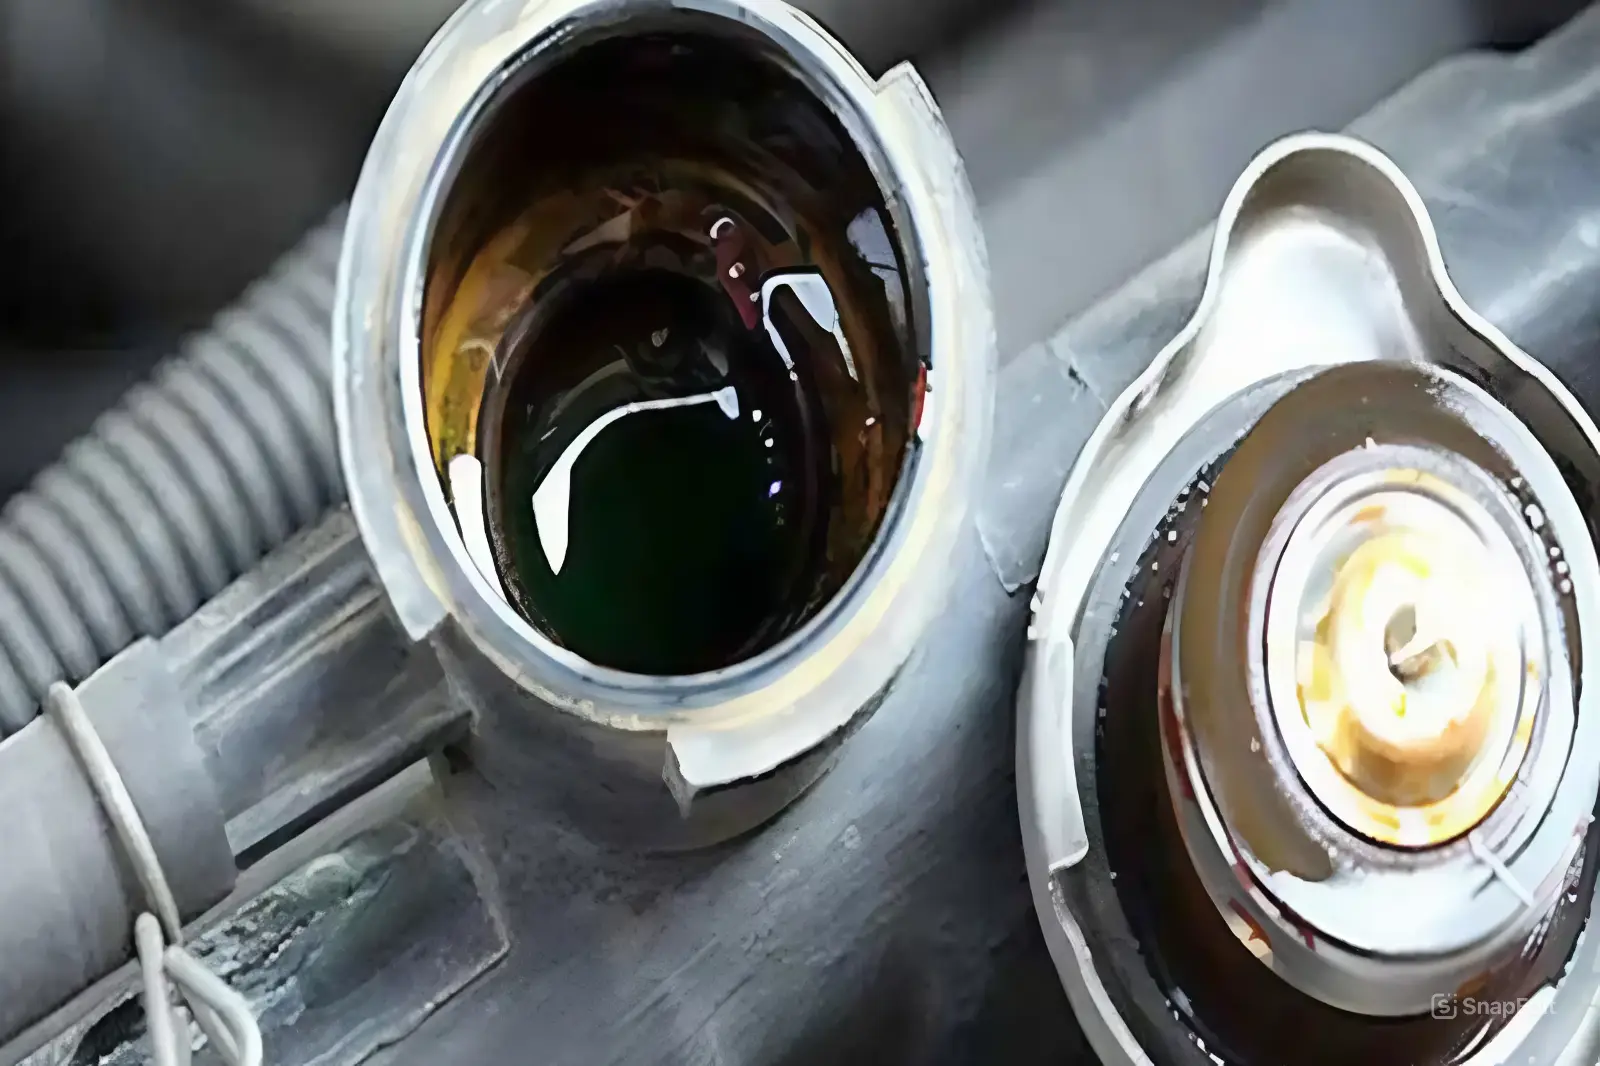
If you see dried coolant or crusty buildup around the radiator cap, it’s likely leaking.
2. Engine Overheating
A faulty cap can’t hold pressure. That leads to radiator pressure loss, which causes overheating.
3. Collapsed Radiator Hoses
Without proper pressure, hoses can collapse as the engine cools, making it hard to circulate coolant.
4. Low Coolant Levels (But No Obvious Leak)
If coolant levels drop and you can’t find a leak, the cap might be letting vapor escape.
The Quick DIY Fix to Stop the Leak
Here’s the quick trick that helped me when I couldn’t find a new cap:
1. Check the Rubber Seal
Take the cap off and look at the rubber seal inside. If it looks dry, cracked, or flattened, that’s probably your issue.
2. Tighten the Fit with a Simple Squeeze
This is the genius part. The radiator cap has small metal tabs (the part that grips onto the radiator). Use pliers to gently squeeze them inward. This makes the cap fit tighter when you put it back on.
It’s not a permanent fix, but if you’re in a pinch or just need to make it home, it works surprisingly well. Once tightened, twist the cap back on. It should feel snug—no wiggling or loose turn.
3. Recheck the Seal
Start the engine, let it run for a bit, and see if any coolant is still leaking around the cap. If not, you’ve bought yourself some time.
When to Replace the Radiator Cap
This fix is temporary. Eventually, you’ll need a proper replacement to ensure your system holds pressure and keeps the coolant where it belongs.
1. If the Rubber Is Cracked or Missing
A cracked or missing seal can’t hold pressure no matter how tight the fit.
2. If the Cap Doesn’t Lock Firmly
A wobbly or loose-fitting cap, even after tightening the tabs, needs to be replaced.
3. If Overheating Persists
Even after the DIY fix, if your engine still overheats, don’t gamble with it. A new cap is cheap and easy to replace.
Extra Tips for Keeping Your Cooling System in Top Shape
1. Check Coolant Levels Regularly
Low coolant can mean bigger issues. Always keep an eye on your levels.
2. Don’t Open the Cap When Hot
Wait until the engine cools down before checking or removing the radiator cap. Hot coolant under pressure can cause burns.
3. Use the Right Coolant
Mixing types or using the wrong coolant can reduce effectiveness and cause buildup.
4. Inspect Hoses and Connections
A radiator cap might not be the only culprit. Check the whole system for wear, cracks, or loose clamps.
Why Pressure Matters in Your Cooling System
Without proper pressure, coolant can boil over and fail to circulate effectively. That leads to hot spots in the engine, poor fuel efficiency, and eventually engine damage.
A good radiator cap ensures the pressure stays within the optimal range and releases only when it absolutely has to. Think of it like a pressure relief valve that keeps everything balanced.
Common Mistakes When Replacing a Coolant Cap
1. Buying the Wrong Pressure Rating
Radiator caps come in different pressure ratings. Using one with the wrong specs for your vehicle can cause either too much or too little pressure.
2. Not Cleaning the Radiator Neck
If there’s gunk or rust on the radiator neck, it can prevent the new cap from sealing properly.
3. Ignoring Signs of a Bigger Problem
Sometimes a bad cap is just a symptom. If your car keeps overheating or leaking coolant, get the system checked for cracks or blown gaskets.
Final Thoughts
Fixing a leaking radiator cap doesn’t have to be complicated. With a simple squeeze and a bit of attention, you can fix the radiator cap temporarily and avoid overheating on the road. Just remember—it’s a short-term solution, not a permanent one. Replace the cap as soon as you can to keep your car running cool and smooth.
