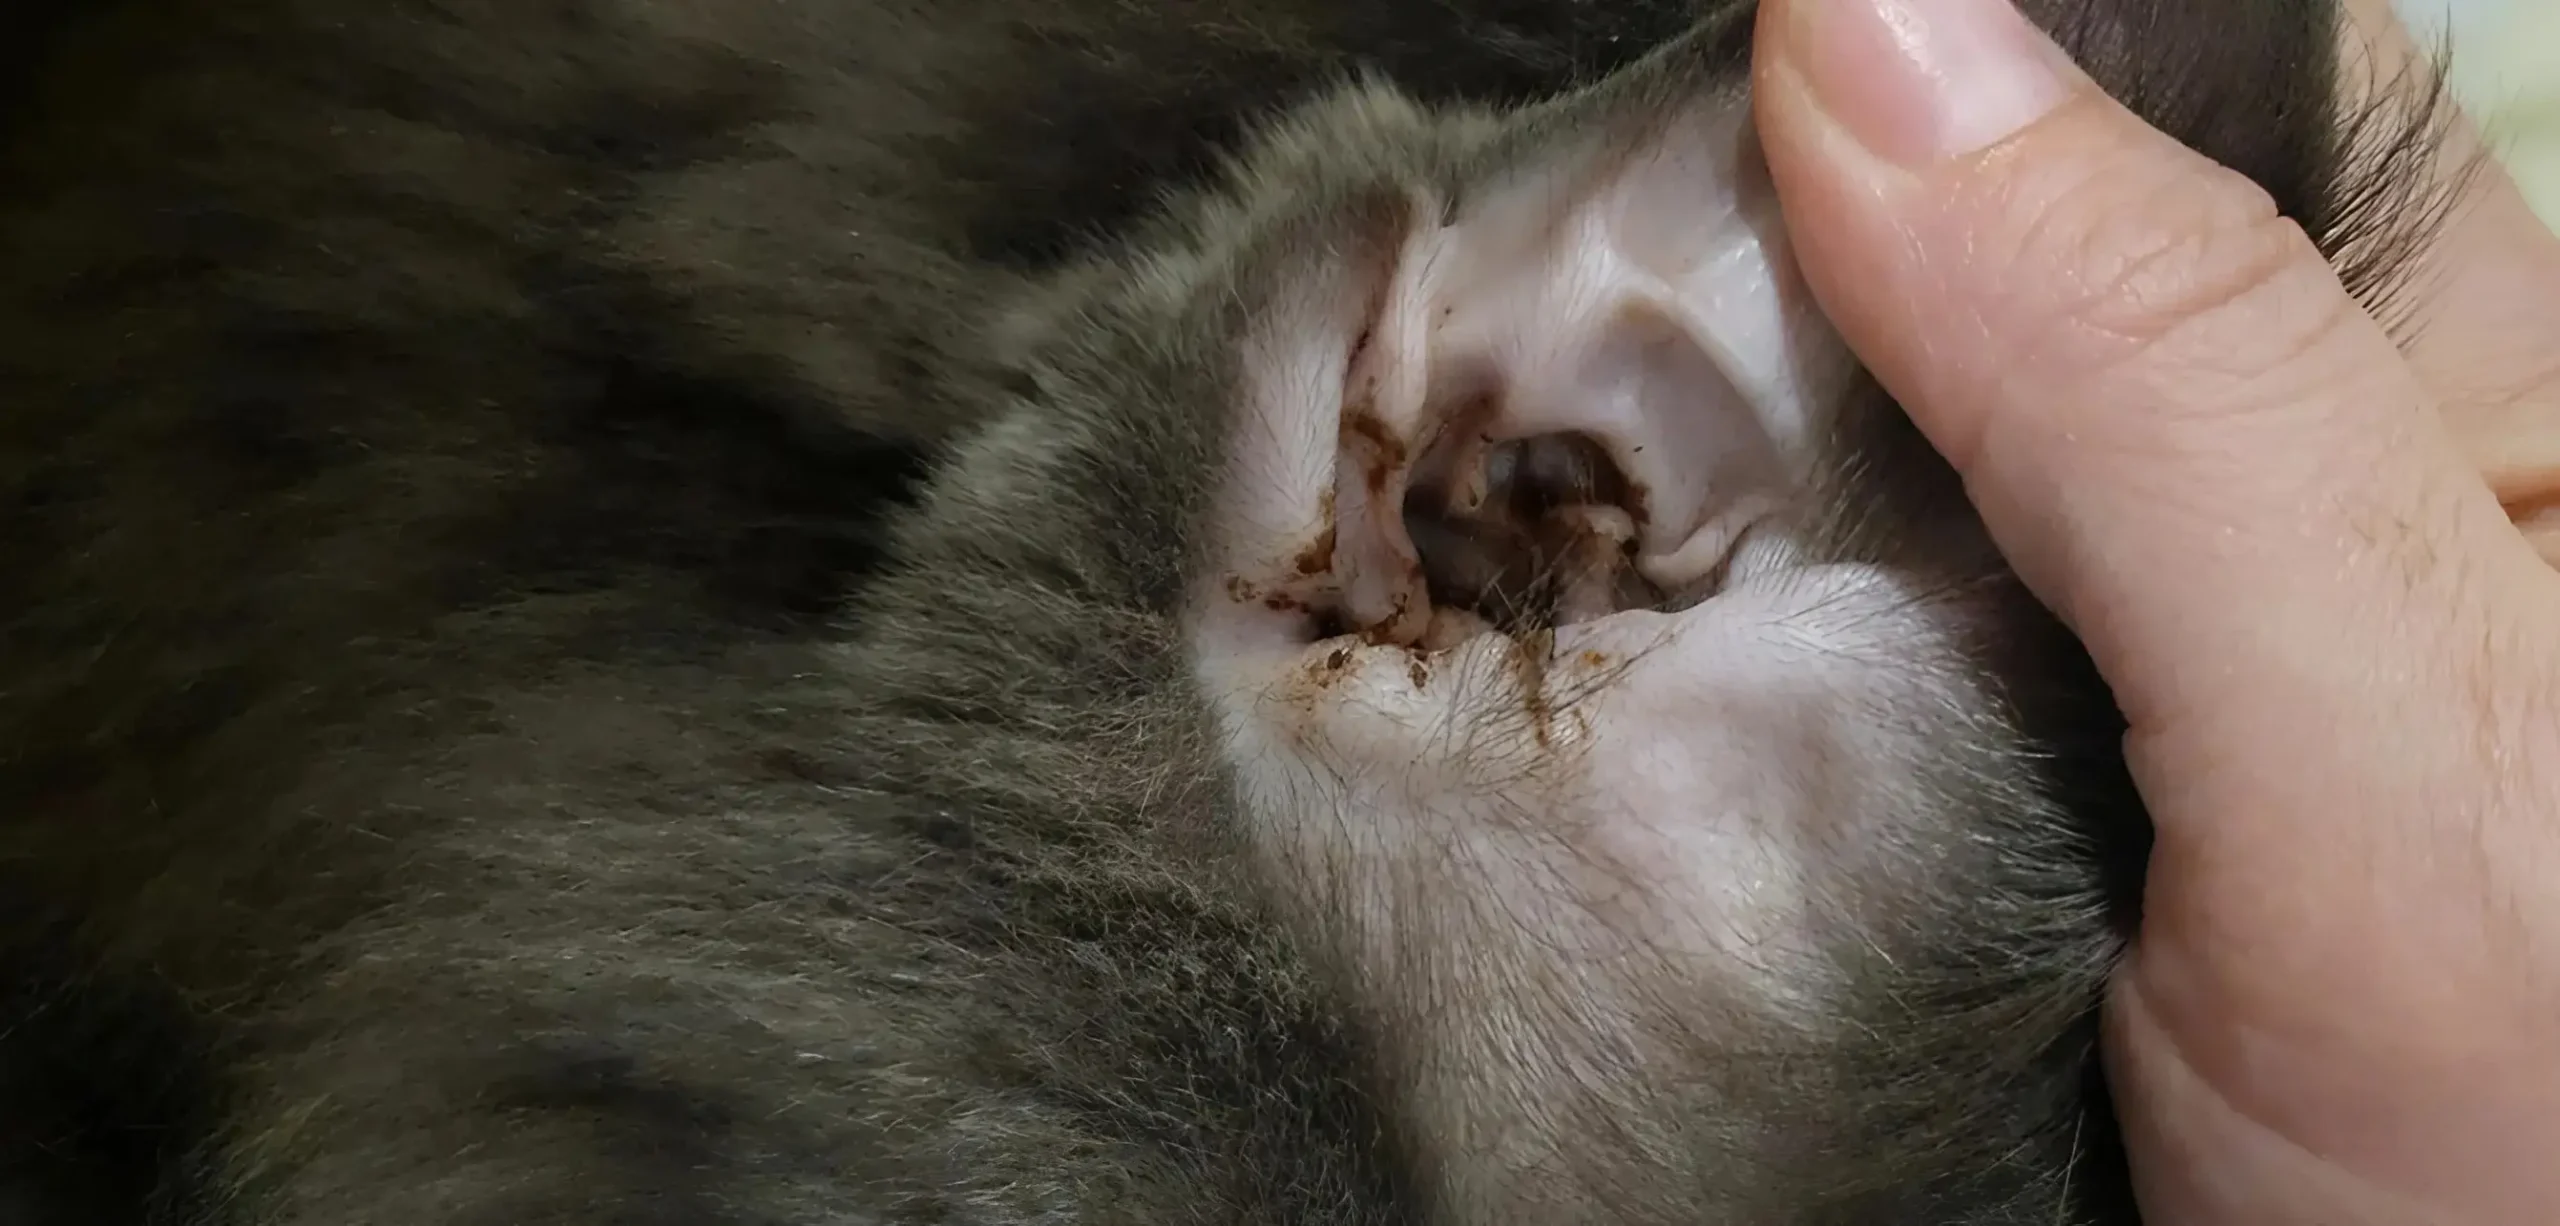
Ever been confused about how to clean your cat’s ears without turning it into a wrestling match? You’re not alone. A lot of pet owners aren’t sure if they’re doing it right, or worse—if they might accidentally hurt their cat. The truth is, knowing how to clean cat ears properly is a simple skill that makes a big difference in your cat’s overall health.
In this guide, we’ll walk you through how to clean your cat’s ears at home, what tools you need, how often to do it, and signs that it’s time to call your vet. Let’s make ear cleaning stress-free—for both you and your feline friend.
Table of Contents:
- 1. Why Cat Ear Cleaning Is Important
- 2. When to Clean Your Cat’s Ears
- 3. What You’ll Need
- 4. Prepare Your Cat for Ear Cleaning
- 5. Apply the Ear Cleaning Solution
- 6. Massage the Base of the Ear
- 7. Wipe Away the Debris
- 8. Apply Ear Medication (Optional)
- 9. Give Praise and Treats
- 10. How Often Should You Clean Your Cat’s Ears?
- 11. When to Call the Vet
- Final Thoughts
1. Why Cat Ear Cleaning Is Important
Cats are great self-groomers, but their ears can still trap dirt, wax, bacteria, and even parasites like ear mites. This can lead to infections, discomfort, and hearing problems if left untreated. Ear cleaning is especially important for long-haired cats or breeds prone to ear issues like Himalayans or Persians.
You don’t need to clean your cat’s ears every week, but knowing how to clean cat ears safely can help you spot potential problems early—and prevent them from getting worse.
2. When to Clean Your Cat’s Ears
Not every cat needs regular ear cleaning. Some felines maintain good ear hygiene on their own. But here are signs that might tell you it’s time:
- You notice a waxy buildup
- Your cat keeps shaking its head or scratching its ears
- There’s a bad odor coming from the ears
- You see discharge, redness, or swelling
If you spot any of these signs, it’s a good idea to check their ears and clean them gently—or consult a vet if things seem serious.
3. What You’ll Need
Before you start, gather these supplies:
- A cat-specific ear cleaning solution (available at pet stores or from your vet)
- Cotton balls or gauze pads
- Soft towel or small blanket
- Treats or your cat’s favorite toy
- Optional: Alcohol wipes to sanitize the bottle nozzle
Avoid using cotton swabs (Q-tips) or your fingers inside your cat’s ear canal. These can push debris further in or cause damage.
4. Prepare Your Cat for Ear Cleaning
Make sure your cat is in a calm mood—after a nap or a meal is usually best. Take them to a quiet, well-lit area of your home.
Pro Tip: Wrap your cat gently in a soft towel to prevent sudden movements. This helps both of you stay safe and stress-free.
If your cat is fidgety, ask a family member to help hold them gently while you clean.
5. Apply the Ear Cleaning Solution
Hold your cat’s ear flap (also known as the pinna) and gently tilt their head sideways. Squeeze a few drops of the ear cleaning solution into the ear canal as directed on the label. Don’t insert the nozzle too deep—just let the drops flow in naturally.
Your cat will probably shake their head afterward—and that’s okay! It actually helps spread the cleaner and loosen the debris inside.
6. Massage the Base of the Ear
Once the solution is inside, massage the base of your cat’s ear for about 20–30 seconds. You might hear a squishy sound—that’s the cleaner doing its job and breaking up the gunk.
This step is super important because it helps the solution reach deeper and dissolve more wax and debris without being invasive.
7. Wipe Away the Debris
After massaging, use a cotton ball or gauze pad to gently wipe away the loosened debris and fluid from the outer ear. Only clean the parts of the ear you can easily see—don’t dig in.
Repeat the process with the other ear if needed.
8. Apply Ear Medication (Optional)
If your vet has prescribed an ear medication for your cat—like for treating ear mites or a mild infection—this is the time to apply it. Follow the dosage and instructions exactly.
9. Give Praise and Treats
Don’t forget the reward! Offer your cat a treat, toy, or extra cuddle session. This helps your cat associate ear cleaning with something positive—and makes next time a whole lot easier.
10. How Often Should You Clean Your Cat’s Ears?
For most cats, cleaning their ears every 2 to 3 months is enough. However, long-haired or allergy-prone cats may need more frequent cleanings. You can also clean their ears after a bath.
Don’t overdo it! Cleaning too often can irritate the ears and strip away protective wax.
11. When to Call the Vet
If your cat shows any of these signs, it’s best to schedule a vet visit:
- Constant scratching or shaking of the head
- Discharge that’s dark brown, yellow, or green
- Strong odor from the ears
- Redness, swelling, or bleeding
- Your cat yelps when you touch their ear
Some of these symptoms could be caused by ear infections, mites, or allergies, and they need professional treatment.
Final Thoughts
Cleaning your cat’s ears doesn’t have to be stressful or scary. Once you know the right steps and have the right tools, it becomes part of your normal grooming routine. The key is to be gentle, stay calm, and make it a positive experience for your kitty.
So, what do you think? Ready to try it out today?
